Configuring the 3CX desktop app
The new 3CX desktop app allows you to receive calls to your extension using your PC.
It will also replace the legacy 3CXPhone for Windows app, which will no longer work on newer versions of 3CX.
To download and install the new desktop app, you will first need to log into the web client for your extension. The instructions for logging into the web client are included in your Welcome Email.
If you can't login to the web client and you can't find your Welcome Email, contact the Private Universe Helpdesk.
Downloading the desktop app
-
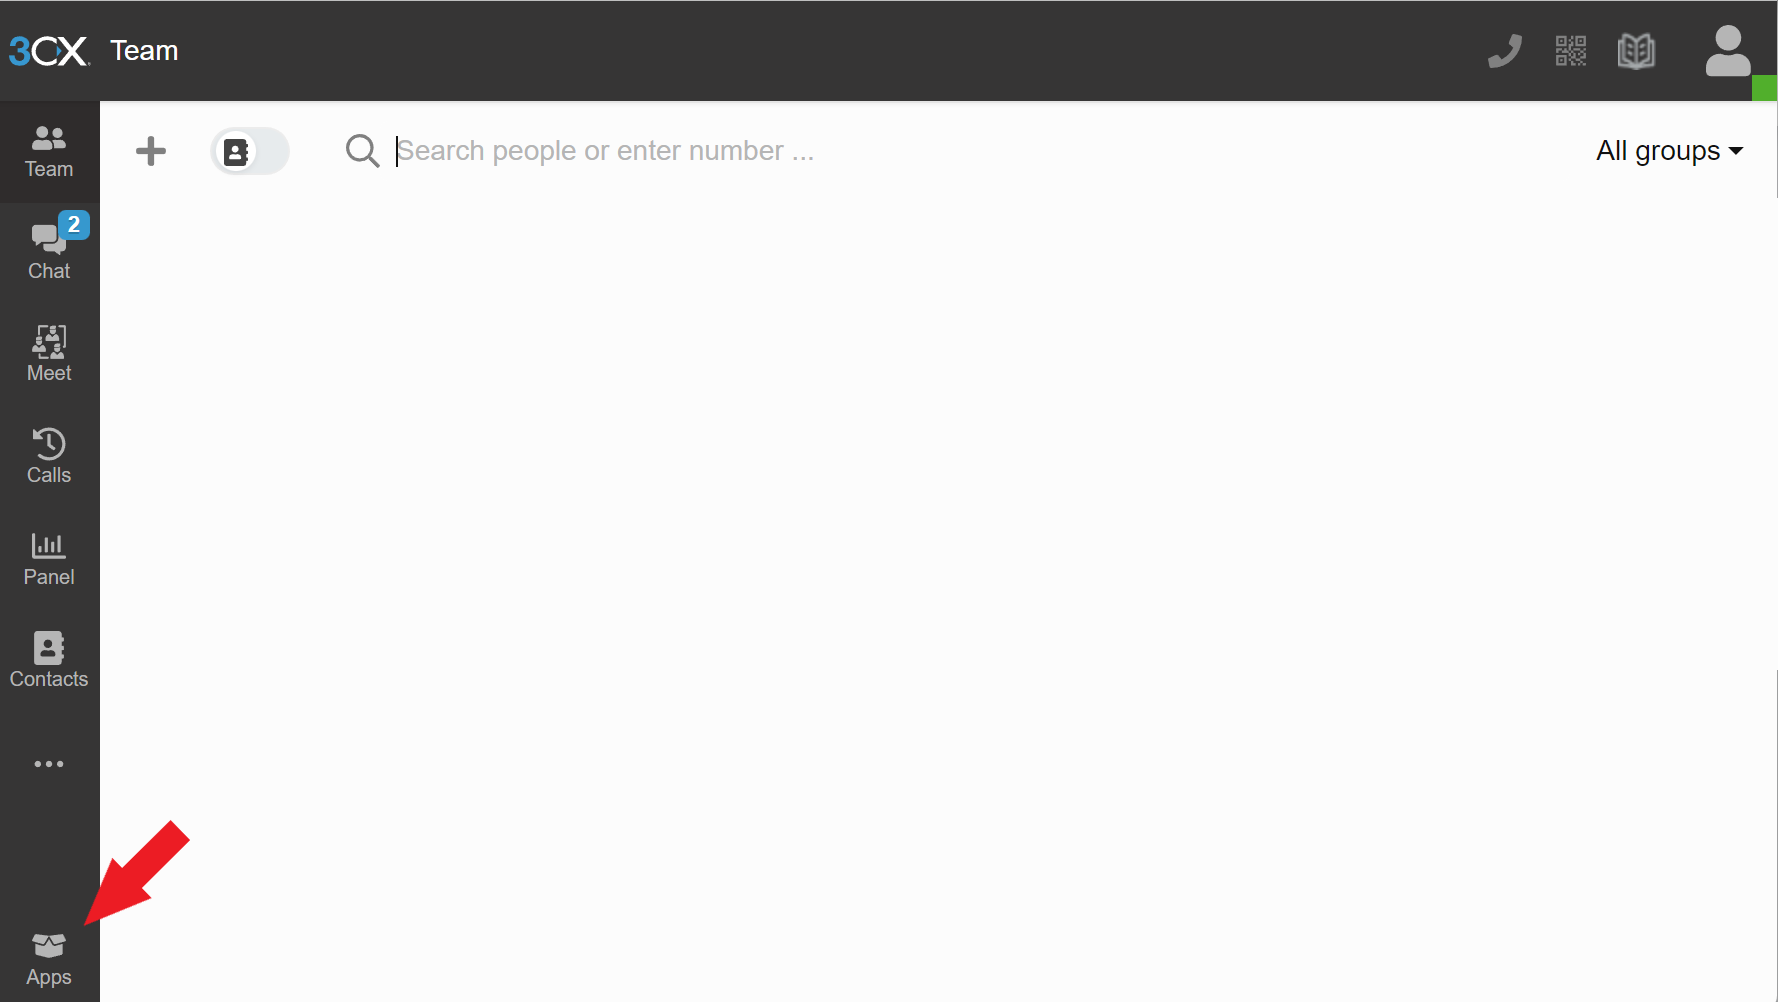
Upon logging into your web client, you should find yourself on a screen similar to the one below. Find and click on the "Apps" button in the bottom right corner.
-
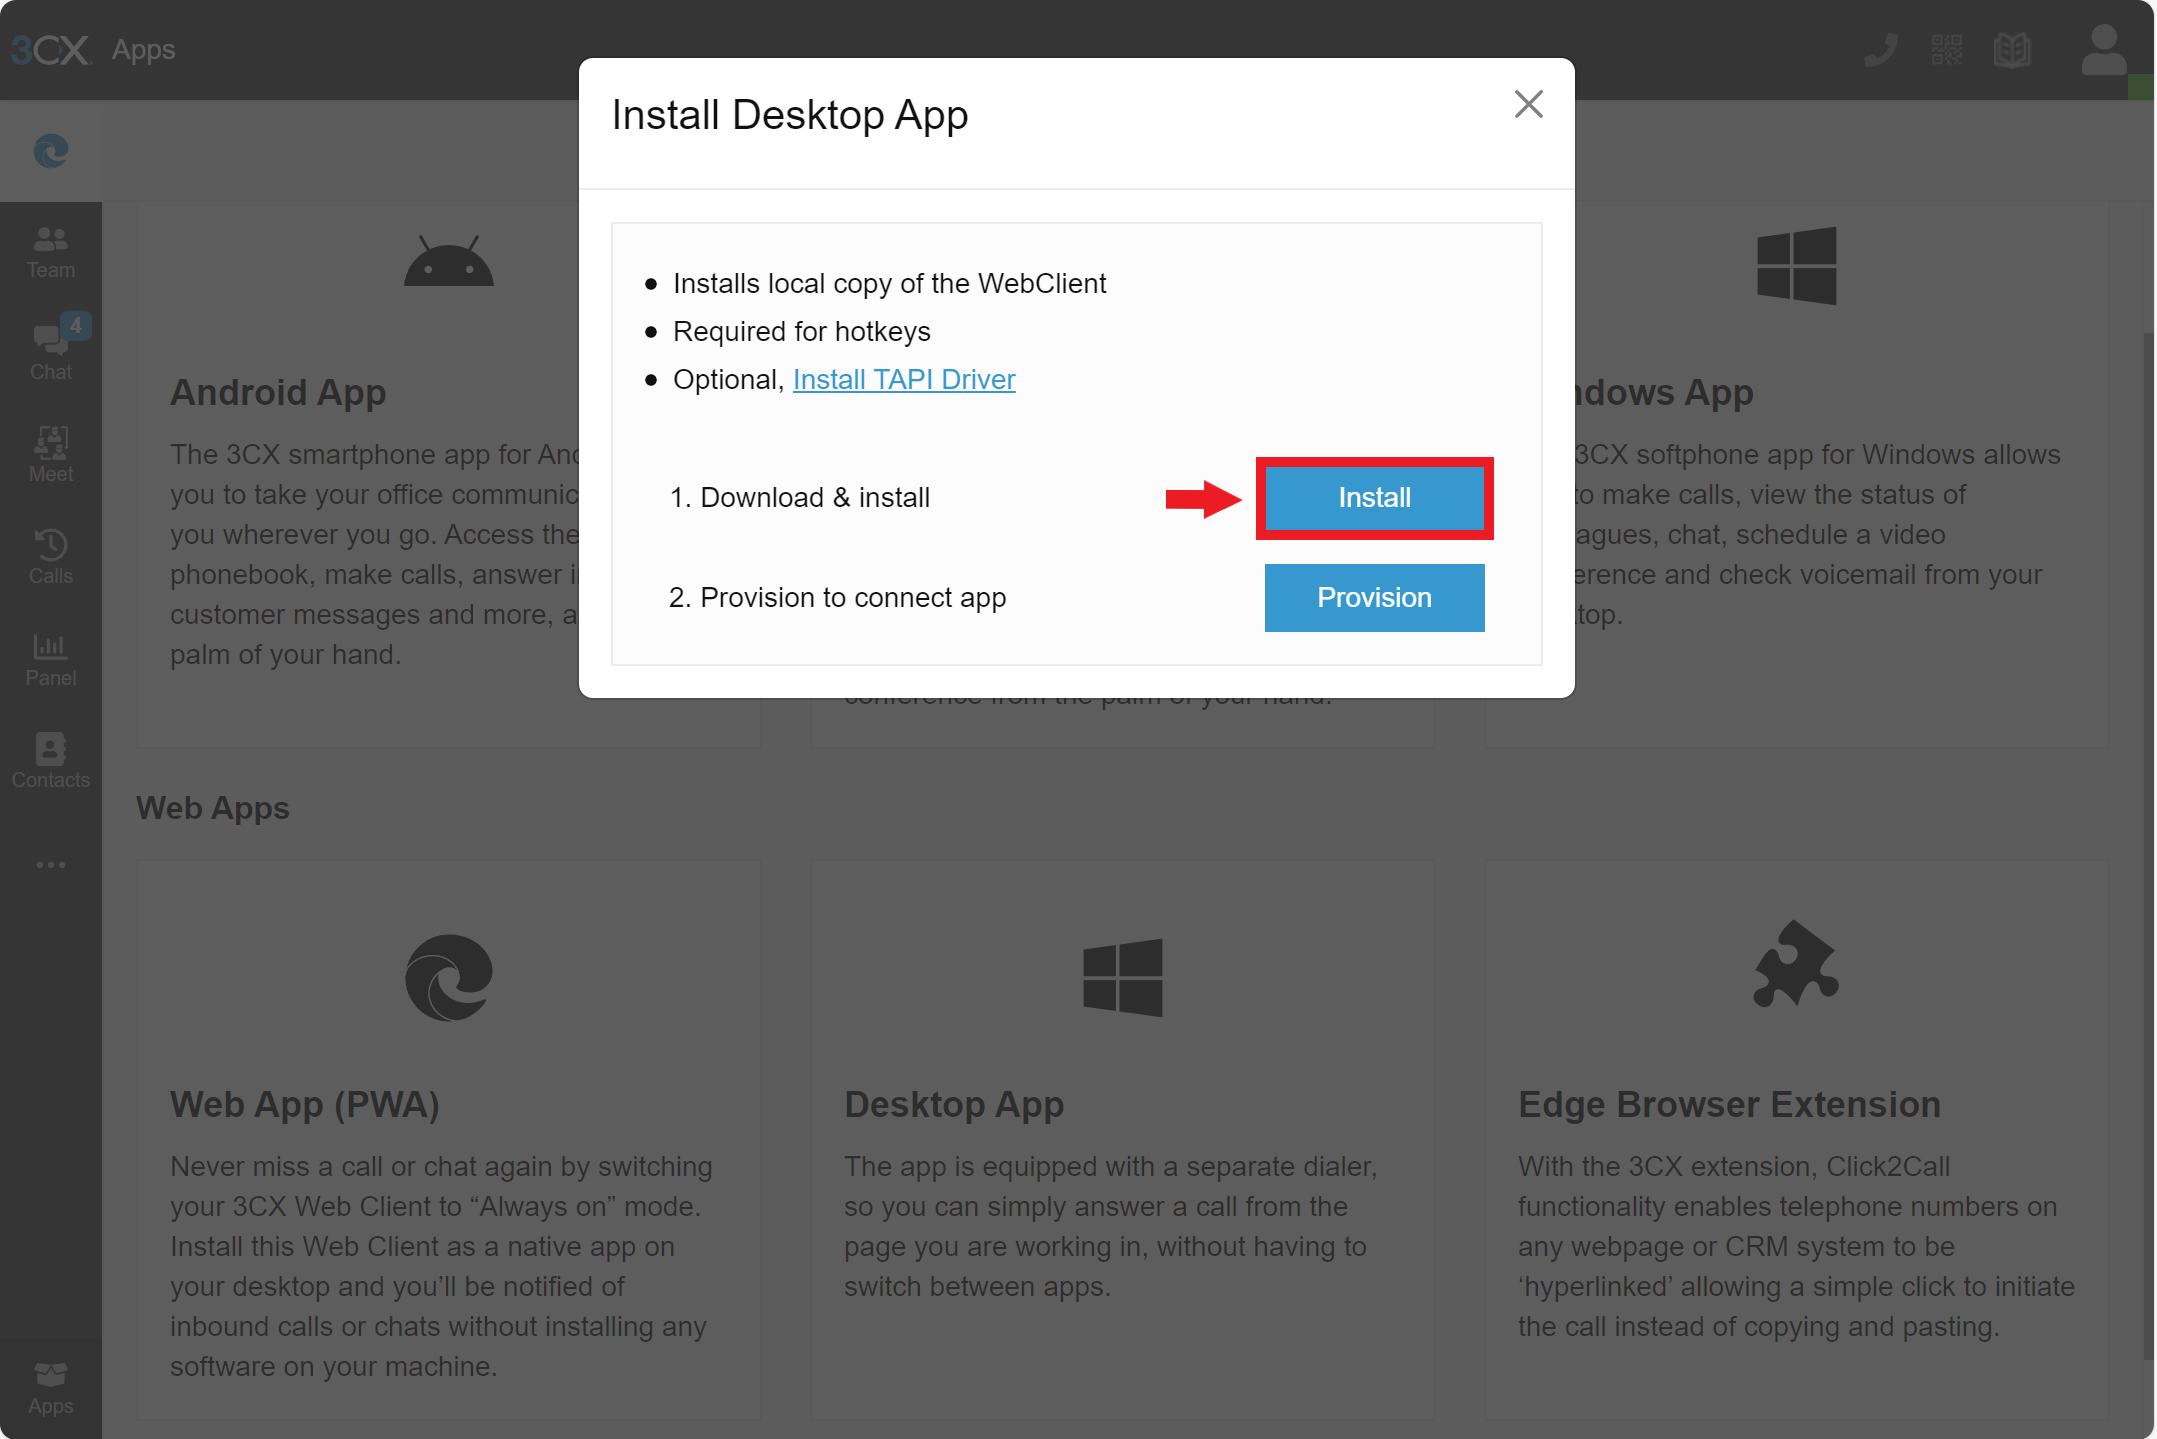
This will bring you to a new screen, where you will have the option to download several 3CX apps. Click on the option for "Desktop App".

-
You will get a pop-up that looks like this. Click on the "Install" button to download the installer for the 3CX desktop app. Once the download has completed, double-click the file to install the 3CX desktop app.
-
After the 3CX desktop app has finished installing, it will ask you to provision your desktop app. Simply click on the "Provision" button shown below, and select "Open" when prompted to open the link in the 3CX desktop app.

Following this, the 3CX App may ask for more permissions to use your microphone and access your calls. You will want to allow access in all cases.
Congratulations, you are now ready to use the 3CX desktop app!